Need to insert an invisible zipper but not sure where to start? This guide delivers clear instructions on choosing and fitting an invisible zipper, ensuring a sleek finish for any garment. Learn to select the right type, achieve an undetectable seam, and address any issues with ease. Step into the world of hidden zippers where impeccable results await.
Key Takeaways
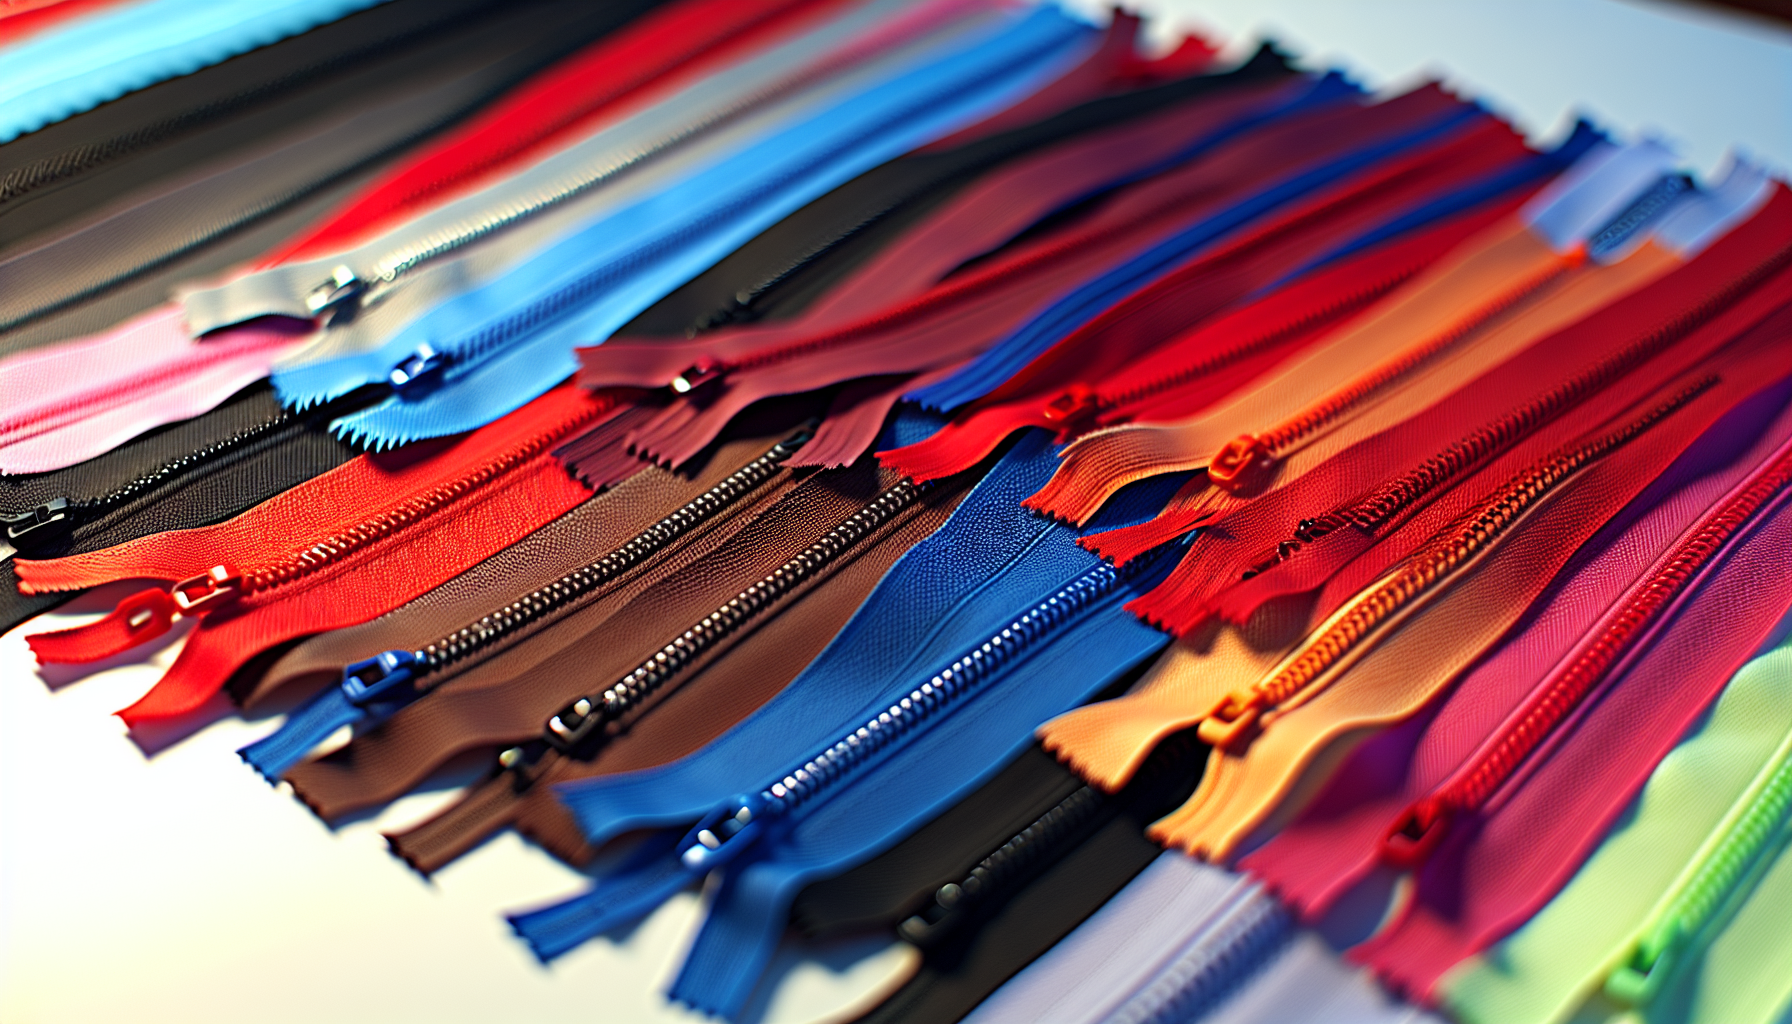
Selecting the right invisible zipper involves considering the fabric weight, color matching to ensure the zipper’s invisibility, and opting for quality brands like YKK for better functionality.
Essential tools for sewing invisible zippers include an invisible zipper foot, a sewing machine, and general supplies, but proper fabric and zipper preparation are also key to a clean installation.
When attaching an invisible zipper, meticulous alignment, precise stitching, and sewing the rest of the garment seam carefully will ensure a seamless finish; while troubleshooting common issues like misalignment and visible stitching with patience can help perfect the technique.
Choosing the Right Invisible Zipper for Your Project
When it comes to invisible zippers, selecting the right one for your project is no small feat. It’s not just about picking a zipper that looks good, but also one that works well with your chosen fabric. For instance, the weight of your fabric dictates the most suitable type of invisible zipper to use. Once you’ve made the right selection, learning how to sew invisible zippers can greatly enhance your project’s final appearance.
Here are some tips for choosing the right invisible zipper for your project:
Lightweight fabrics require a delicate balance, demanding stitching close to the zipper teeth that doesn’t interfere with the fabric’s drape and movement.
Medium-weight fabrics can handle a slightly heavier zipper, but still require careful stitching to maintain the fabric’s integrity.
Heavyweight fabrics can handle a sturdier zipper, but be sure to choose one that won’t add unnecessary bulk to your garment.
By considering the weight and characteristics of your fabric, you can choose the perfect invisible zipper for your project.
Moreover, the color of the zipper plays a vital role in maintaining the overall aesthetics of your garment. It is crucial to select a zipper color that closely matches the fabric hue to ensure the zipper remains, well, invisible. Now that we understand the basics, let’s dive deeper into the world of invisible zippers.
Decoding Zipper Sizes
Understanding zipper sizes plays a significant role in ensuring a flawless finish. The size of your invisible zipper should vary alongside the weight of your fabric. For instance, lightweight fabrics demand a more precise stitching close to the zipper teeth. On the other hand, with thicker fabrics, while it’s still important to stitch close to the teeth, there’s slightly more room for error.
In a nutshell, the trick is to properly analyze your fabric weight and choose the zipper size that best compliments it. Nailing this step will pave the way for a smooth and seamless zipper installation.
Matching Colors with Fabrics
Color coordination is not only essential in fashion but also in sewing. Choosing a zipper color that closely matches your fabric’s hue is crucial. The last thing you want is for your invisible zipper to stand out like a sore thumb, detracting from the overall look of your garment.
So, when you pick out your invisible zipper, don’t just focus on the size and quality. Take a moment to ensure the color is in harmony with your fabric. It’s the little details that make a big difference!
Quality Matters
While it’s important to consider factors like size and color when choosing your invisible zipper, let’s not forget about quality. The quality of your zipper can significantly enhance the overall finish and functionality of your sewing project.
Investing in high-quality zippers, including regular zippers, from reputable manufacturers like YKK can ensure smoother operation. This is particularly essential for garments like dresses and skirts that demand a flawless appearance. So, although it might be tempting to cut costs, remember that a high-quality zipper can elevate your sewing project to new heights.
Essential Tools for Sewing Invisible Zippers
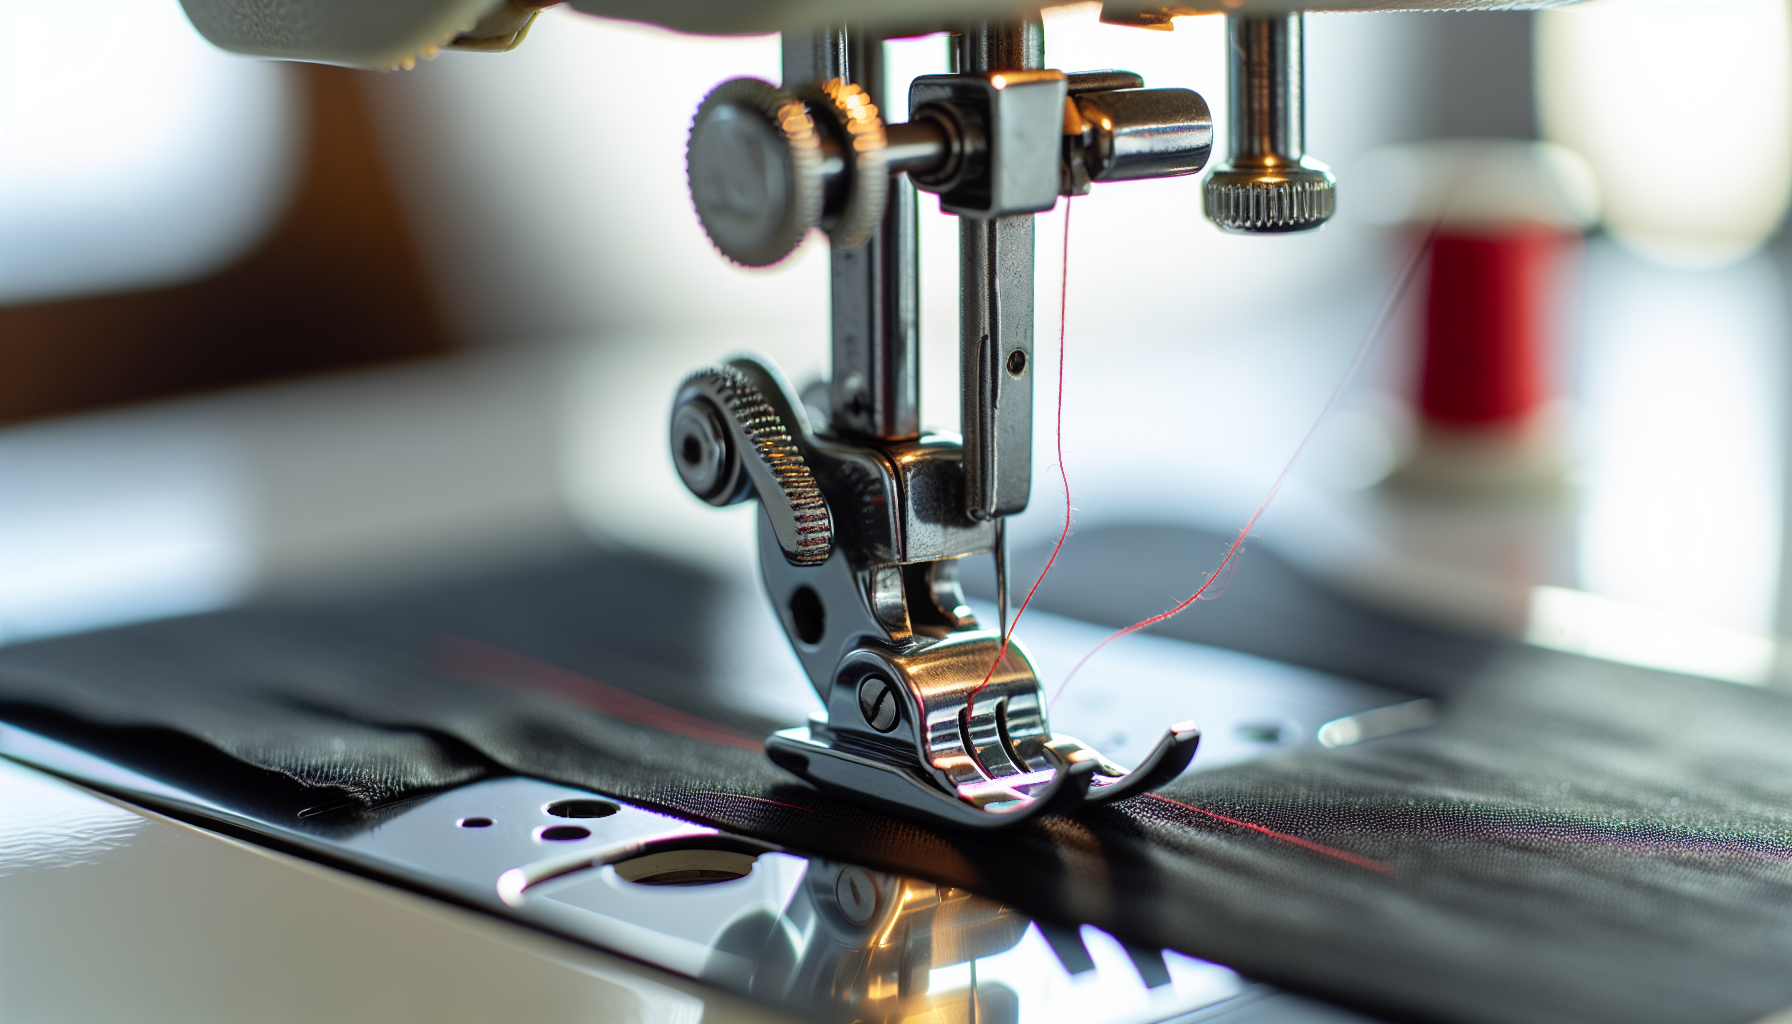
Now that we’ve selected the perfect invisible zipper, it’s time to gather our tools. The invisible zipper foot is your best friend when it comes to installing invisible zippers. Designed with grooves to accommodate the zipper teeth, this tool ensures your stitches are close to the teeth but not over them. This is crucial for hiding stitches and ensuring correct zipper functionality.
In addition to the zipper foot, you’ll need your trusty sewing machine and general sewing supplies such as fabric, thread, and needles. While a regular zipper foot can be used in place of an invisible zipper foot, it requires careful handling to prevent stitching too near to zipper teeth.
With the right tools at your disposal, achieving success becomes pretty easy!
Prepping Your Fabric and Zipper
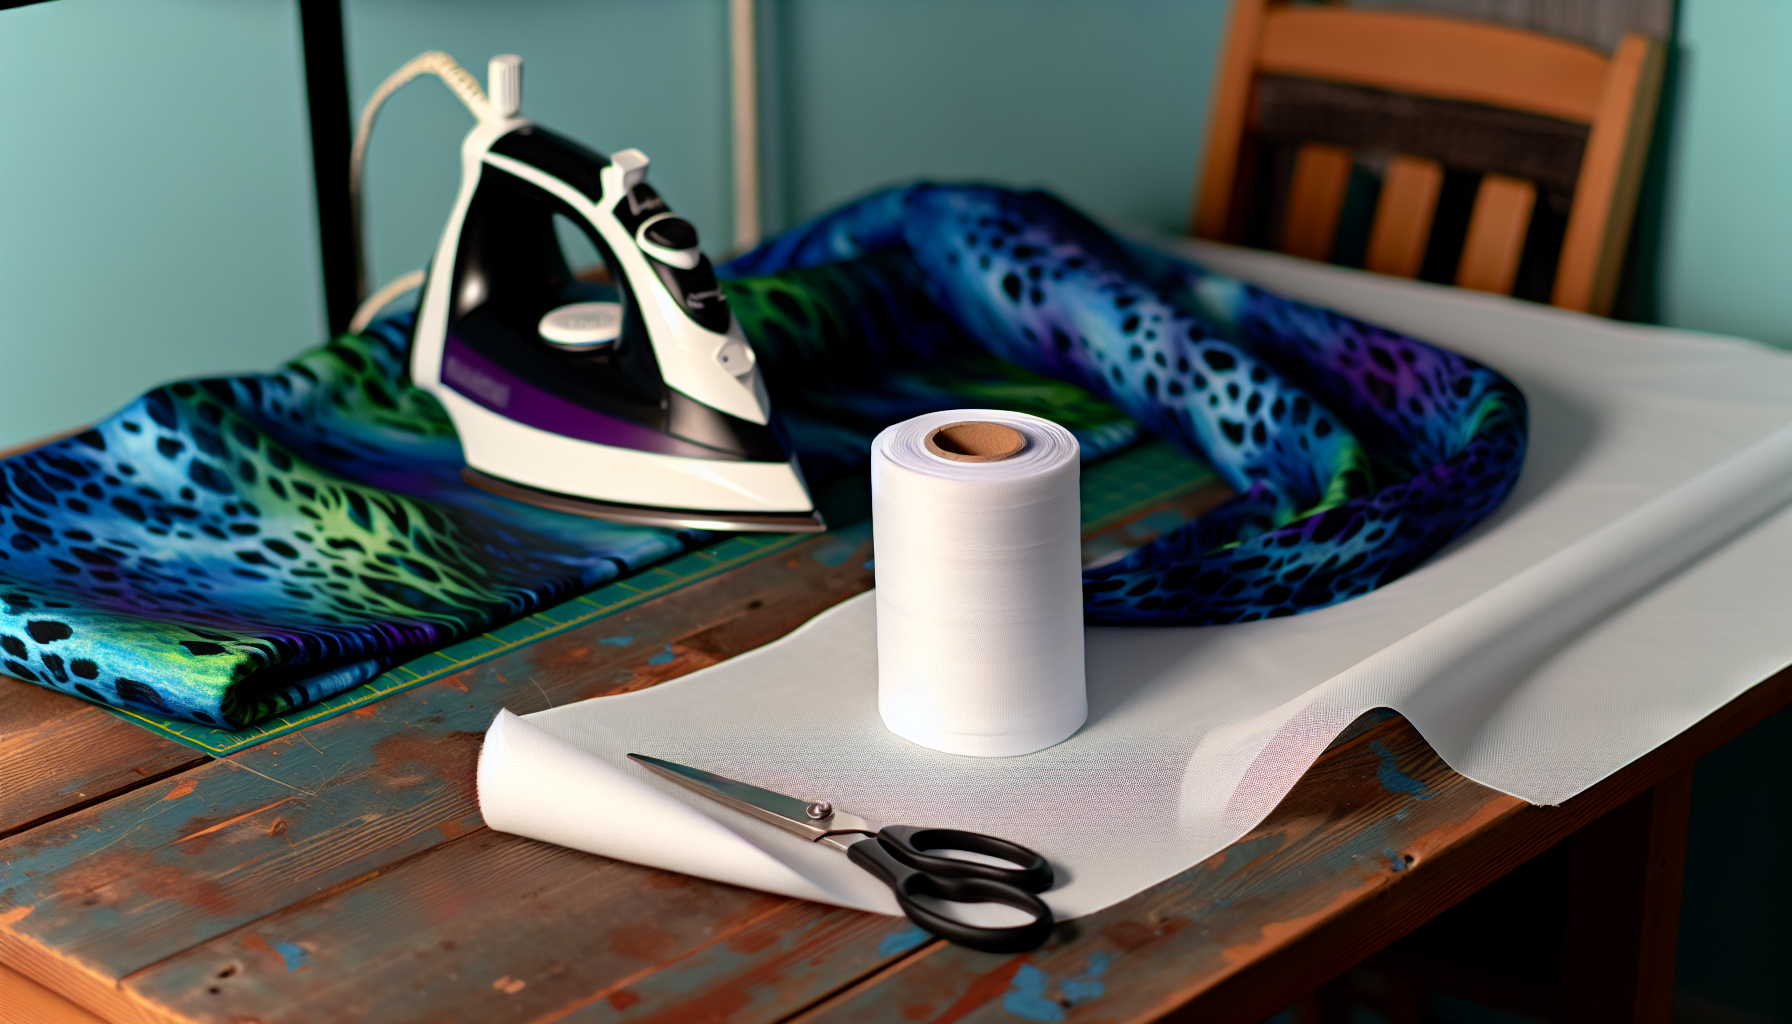
Before we dive into the installation, let’s talk about preparation. As with any sewing project, prepping your fabric and zipper is a crucial step. Start by finishing the edges of the garment where the zipper will be installed. This could involve serging, pinking, or using a zigzag stitch to prevent fraying.
Next, stabilize the fabric by applying fusible interfacing strips that align with the stitching line. This will provide a solid base for your zipper. Now, it’s time for some detailed steps: pressing the zipper and marking the placement.
Ironing the Zipper Tape
Ironing the zipper tape is an essential step in the prep process. This helps straighten the curled teeth of the zipper coil, ensuring the zipper lays flat against the fabric and is ready for installation.
Start by setting your iron on low heat to prevent melting the plastic zipper teeth. Lay the zipper wrong side up on an ironing board and gently press the tape, uncurling the teeth in the process.
Ironing the zipper tape before installation can make the teeth lie flatter against the fabric, making it easier to achieve closer stitching and minimize visible stitches on the right side of the fabric.
Marking and Aligning the Seam Allowances
Once the zipper tape is ironed and laying flat, it’s time to mark the placement of the zipper on the fabric. Accurate marking and alignment of seam allowances are crucial to ensure the zipper aligns perfectly with your garment.
To mark the fabric for sewing an invisible zipper, follow these steps:
Mark a vertical line on the right side of the fabric that is 1/8 inch wider than the seam allowance. This will accommodate the unrolling of the invisible zipper teeth during stitching.
Add a horizontal line at the top edge of the fabric to position the top stop of the zipper accurately.
With the marking in place, align the zipper teeth with the marked seam line, not with the cut edge of the fabric, to achieve correct placement when sewing.
Attaching the Invisible Zipper
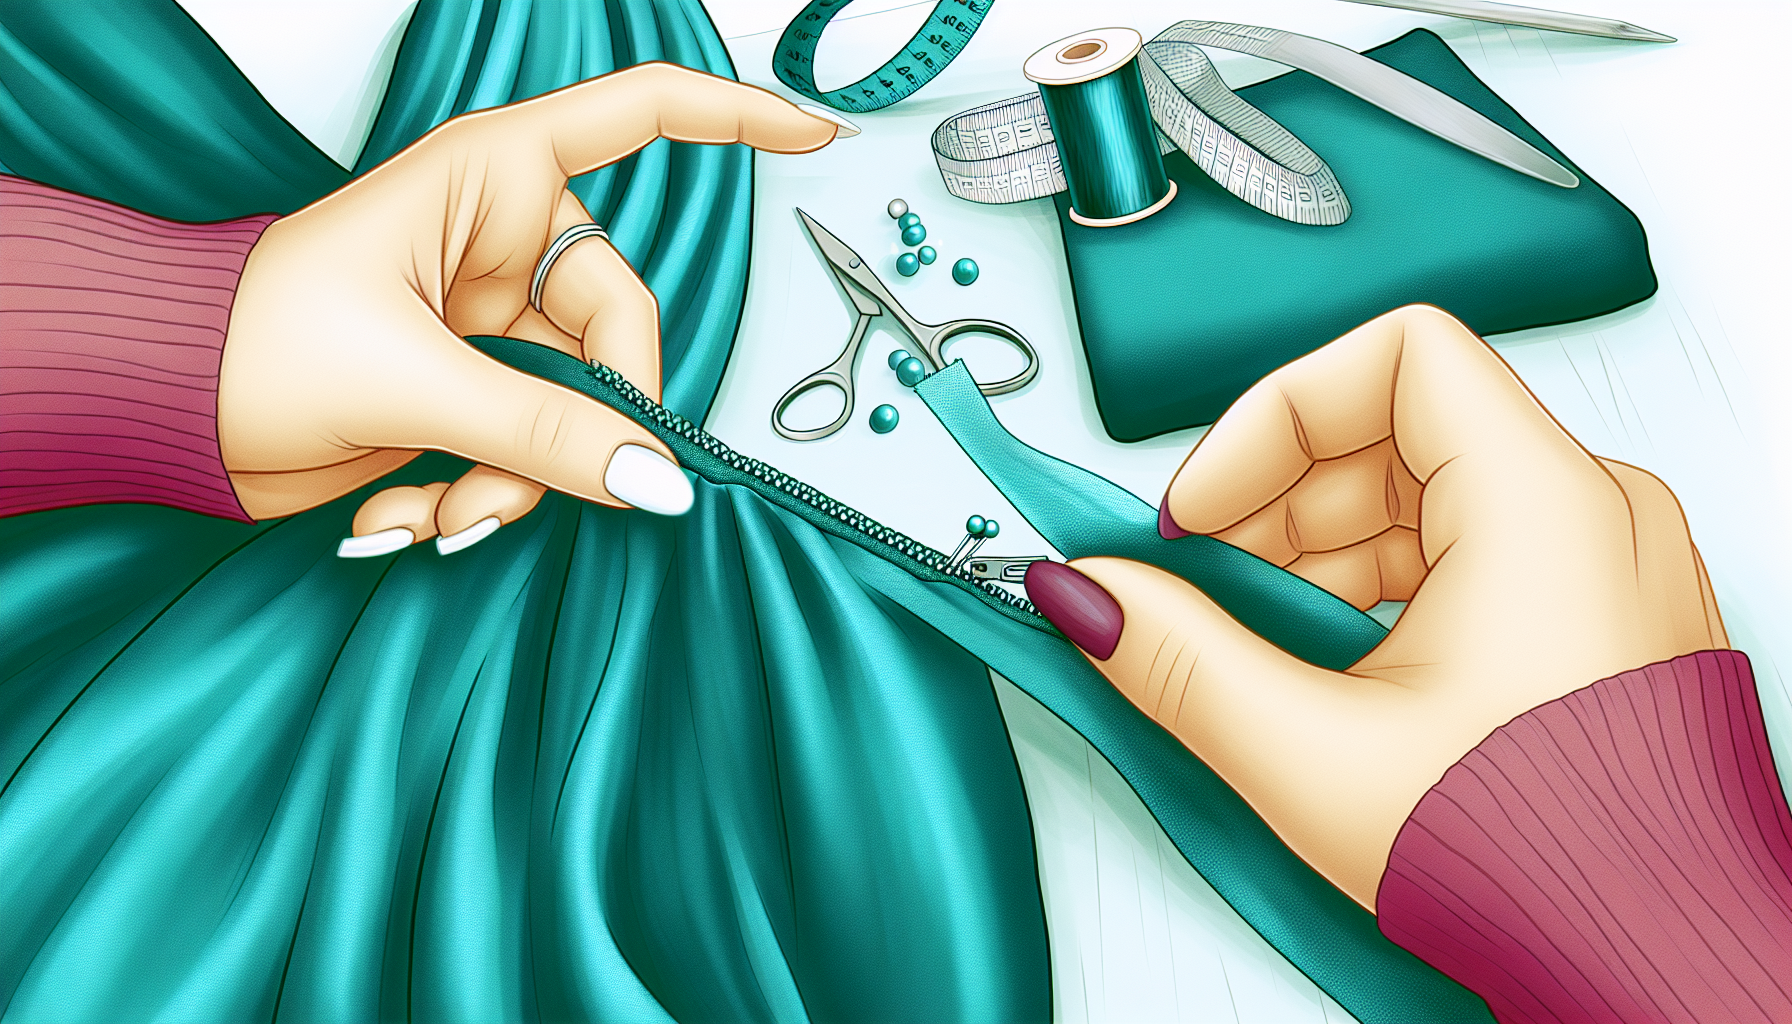
Now that our fabric and zipper are prepped, it’s time to dive into the main event - attaching the invisible zipper. Start by laying the zipper on the fabric with the right sides together, ensuring the zipper teeth point away from the raw edge.
To sew an invisible zipper, follow these steps:
Place the zipper teeth under the left groove of the invisible zipper foot.
Stitch from the top edge down to the zipper stop.
Don’t forget to secure the end with a backstitch.
This first line of stitches is crucial, so take your time and ensure your stitches are straight and even.
The First Stitch Line
The first stitch line plays a crucial role in the success of your invisible zipper installation. Begin stitching at the top of the zipper, ensuring the zipper teeth are properly positioned under the groove of the invisible zipper foot.
To sew the fabric, follow these steps:
Sew slowly to avoid puckering the fabric.
Maintain an even tension and take your time to create a straight seam.
Once you reach the marked bottom end, secure the stitch line with a backstitch at both the beginning and end to prevent the stitches from coming undone.
Securing the Other Side
With the first side of the zipper securely stitched, it’s time to attach the other side. Before sewing, ensure proper placement by checking the alignment of the top edge markings when the zipper is closed, and then proceed with the zipper open.
Position the zipper coils flat under the foot groove and continue stitching until you reach the zipper stop. Secure the end with a backstitch. Once both sides of the zipper are sewn, pin and sew the rest of the garment seam, keeping the zipper tail out of the way.
Closing the Seam Post-Zipper Installation

After the zipper has been installed, it’s time to close the seam below the zipper. Here’s how:
Align the fabric’s right sides.
Begin sewing closely from the previously stitched line.
Don’t forget to backstitch at both the beginning and end for a secure seam.
After sewing, press the finalized seam to blend it seamlessly with the rest of the garment, enhancing the garment’s overall finish. Strengthen the zipper installation by sewing a few short stitches to attach the zipper tail to the seam allowance only, preventing it from attaching to the fabric itself.
Troubleshooting Common Issues
Like any sewing technique, installing an invisible zipper comes with its own set of potential issues. However, don’t worry! Most of these issues can be solved with a little know-how and patience. Misalignment, for instance, can be corrected by ensuring both fabric pieces are even at the top starting point before sewing, and double-checking that the seam allowances are consistent when sewing seams.
Visible stitching can be resolved by resewing the zipper without removing the previous stitches and shifting the needle position slightly closer to the teeth. Remember, the key to overcoming these challenges is patience and practice. Keep trying, and you’ll be a zipper master in no time!
Perfecting the Invisible Zipper Technique
As you continue to practice and refine your invisible zipper technique, there are a few additional tips that can help you improve. For instance, sewing a few hand stitches across the zipper teeth just below the stopper can create a new stop point and prevent the zipper pull from coming off.
Additionally, if your zipper isn’t opening and closing easily, try applying a graphite pencil or specialized lubricant along the teeth to improve the zipper’s glide. Remember, mastering any skill takes time and practice, so don’t be discouraged if you don’t get it perfect on the first try. Keep going, and you’ll soon be sewing invisible zippers like a pro!
Enhancing Your Skills with Video Tutorials
For those who learn best by watching, video tutorials can be an invaluable resource. One such tutorial that comes highly recommended is ‘How to Sew an Invisible Zipper’ by Colette Patterns, available on Vimeo.
Video tutorials can provide a visual guide to the techniques discussed in this guide, giving you a clearer understanding of each step. They also serve as a great reminder that proficiency with installing invisible zippers comes with practice, and they encourage sewers to remain patient as they develop their skills.
Summary
We’ve covered a lot of ground in this tutorial, from choosing the right invisible zipper and essential tools to prepping your fabric and zipper, attaching the zipper, and troubleshooting common issues. Remember, mastering the invisible zipper technique isn’t just about enhancing the aesthetic of your sewing projects; it’s also about gaining confidence in your sewing skills. So, keep practicing, and before you know it, you’ll be installing invisible zippers with ease!
Frequently Asked Questions
How to sew an invisible zipper?
To sew an invisible zipper, pin the seam area together right side to right side below the zipper, making sure the zipper tape is not caught within the seam. This will create a seamless finish.
Do I need a special foot to sew an invisible zipper?
You can sew an invisible zipper using your regular zipper foot. However, using a higher quality invisible zipper foot with a groove for the zipper teeth may be helpful. Try it out and see which method works best for you!
What is the difference between an invisible zipper and a regular zipper?
The main difference between an invisible zipper and a regular zipper is that the teeth of an invisible zipper are not visible when installed correctly, whereas the teeth of a regular zipper are visible. So, an invisible zipper creates a seamless look when you see it on a garment.
What is the point of an invisible zipper?
The point of an invisible zipper is to create a smooth, hole-less zipper pull, making it perfect for garments that require a clean and polished look, such as dresses and skirts. They are also relatively easy to install.
Are invisible zippers worth it?
Yes, invisible zippers are worth it because they are more aesthetically pleasing, less likely to catch on other garments or skin, and can be more durable than traditional zippers. So, if you want a seamless and functional closure, they're a great choice.
Comments